Project
- The Cradle
- The Toy Box
- Step Stool
- Dining Room Table
- Splatter Art
- The Treehouse
My parents have a beautiful dining room table. It's rosewood, with oak borders and legs. When they're done with it, I'm taking it. Ever since it arrived (maybe 25 years ago), everyone in the family knows how I feel about the table, especially my brother (who gave the chairs away by mistake, which is a pretty funny story - my mom came home before the truck took them away and had them take the OLD dining room chairs instead of the NEW ones - we laugh about it now, but we don't trust my brother along in the house). It's an extension table that stretches to something like 12 or 14 feet, which makes it perfect for my wife, so she's in favor of the plan. The only problem is, what do we use in the meantime? I'm not trying to get my parents to give me the table before they're done with it, and they do have the entire family over for holidays once or twice a year, so it's still in use.
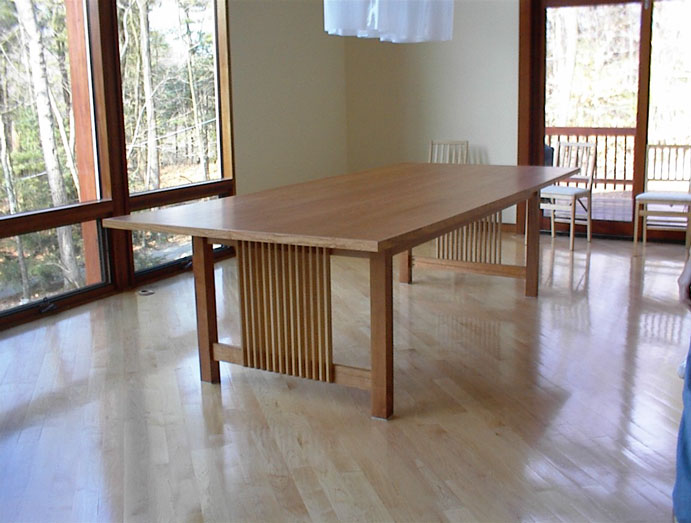
I decided to build a dining room table. I couldn't see spending big bucks for something really nice, when I've got this great table coming in the future. However, my wife hates our current table. I bought it from a Scandinavian furniture store when I first moved into my apartment, so it's a bit small and a bit worn, and was not a great table to begin with (even though it's lasted almost 18 years already). I started buying some woodworking books with tables, and found a really nice design in a book called "Making Contemporary Wooden Tables" by Thomas Stender. The table is the Macsai/Goren Dining Table, and it looks great in the pictures. I had to make some modifications to the design, not because I thought it needed it, but because my wife wanted a larger table. Our table will be 9 feet long and 4 feet wide, which is pretty big.
The plans called for a solid cherry top. I was talking to my friend Rick about buying the wood, and he said that he had gotten some hardwood at a place called Boulter Plywood in Somerville. I started thinking about plywood, and thought that it might be easier to get cherry plywood and use that for the tabletop. It wasn't as thick as I wanted, so I also got some MDF and glued/screwed it to the bottom of the plywood, then glued a band of solid cherry around the edges. I had Boulter cut the wood to the right widths, to make it easier to assemble the table (Rick had said that their cabinet saw was so good, I wouldn't even need to use a jointer).
I finally (according to my wife, anyway) bought the wood at Boulter in December 2003. The plywood, cherry, maple, and MDF cost about $650 (including the cutting). It fit in my car, at least with the tailgate open (which made for fun highway driving in the winter). I also needed some tools (big surprise), so I spent about $300 for supplies at Rockler (including $200 for the Kreg pocket hole kit, but that probably doesn't count the dado blade I had bought a few months before, just in case I needed to build a table or something).
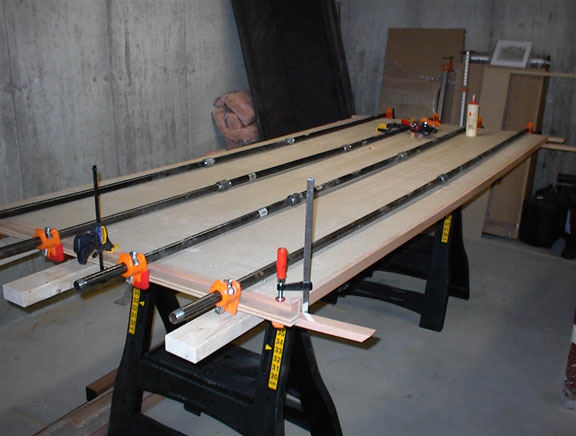
Our new house was still being built, so I set up some working space in the basement. I glued and screwed the MDF to the plywood, then cut the cherry for the edge banding. Another trip to Rockler for a router bit to trim the MDF (maybe $20) and I was in good shape. I learned that mitered corners are trickier than they look, but at least I cut the longer sides first so that when I made them a little too short, at least I could use the wood for the shorter sides. I also learned that I needed more clamps (you can never have too many clamps), and that no matter what Rick said, a cabinet saw is not going to leave a smooth edge like a jointer. Also, MDF generates copious amounts of very fine sawdust, so you have to clean your vacuum filter frequently to avoid damage. Had I really thought about it, I would have tried using the pocket screws to fasten the edge banding, but from a few feet away it should look good enough.
I used a wipe-on polyurethane finish for the top, and it came out looking pretty nice. I was also able to borrow our contractor's tools, so I didn't need to buy a miter saw to cut the pieces for the base (thanks again, Joe). The square cherry pieces that I bought were very rough, but I didn't have access to a planer or jointer, so the mason who worked on our house was extremely helpful and took the rough cherry and returned smooth and fairly straight pieces for the legs (thanks again, Lenny).
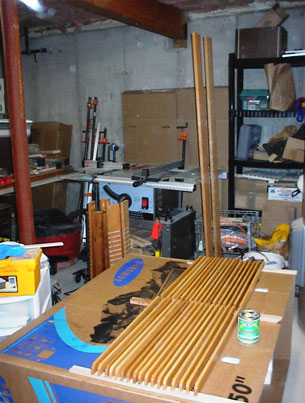
The plans called for 3/4" wide slats in wenge, but we were using maple for a slightly softer look (too bad, as I like to saw "wenge"). I had gotten Boulter to rip enough maple to make the slats, but after I cut them to the right lengths, I found that they were not a uniform width, and they were far too rough to use. My fault for expecting too much - I know it's my job to cut the rough lumber into the pieces I needed. Once again, our contractor suggested calling Littleton Millwork to have them make the slats for me. I finally decided that this would be the best course of action, because I didn't really have the time or the tools to do a good job making the slats, so it would ultimately cost far less to just have them made. A few weeks and $200 later, I picked up 34 maple slats in a nice bundle.
It was mid-March by now, and we had been in the house since the end of January, so my first deadline had passed. A new deadline is coming in May, because we're having a birthday/housewarming party, so we really need the table to be in place. With all the pieces cut, it should be no problem.
I finally got to use my dado blade! I followed the instructions in the book for cutting the slots in the stretchers and aprons, and it seemed to work well. I also used the pocket hole jig to drill the holes for later assembly of the base. The base pieces were finished starting 3/30/04. I got a lot of help from Joe, Bill, and Ted carrying the tabletop upstairs. I completed the base assembly on 4/16/04, and then carried the base upstairs and fastened the top to it on 4/17/04 (Debbie and Doreen helped lift the tabletop onto the base). It seemed secure enough to let the kids use it for Ben's 4th birthday party, so I guess it'll hold. It looks nice, although to be honest, I still see all of the imperfections. If I ever get around to it, I might plug the pocket holes in the stretchers, but then again I might not.
Debbie has already stated that it's OK if we have another family over, but it'll be too small for more than that. I'm glad I didn't need to lift anything larger. I think the plywood top is OK, but if I did it again I'd go with a solid top (maybe using pocket screws to join the boards) and make it a little bit shorter. Overall, I'm satisfied with the way it turned out. The cost was about $1000, including some new tools, and it should last until my parents are done using their table.
Gluing and clamping the edge banding in place:
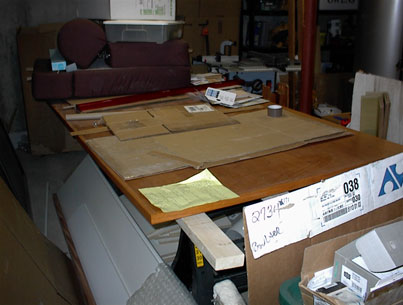
Under the mess is a nice cherry dining room table top:
The parts for the base after the second finish coat:
OK, so what did I learn from this project:
- It's dangerous to modify the dimensions of something without really understanding the ramifications. In this case, I made the table longer and wider so we could seat more people, but I didn't do a good job of planning the distance between the legs, so we can fit three chairs on each side but not four. this has been a problem. we wind up seating 10 by putting two at each end and three on each side, which is less than ideal. Maybe someday I'll redo the base, unlikely but maybe.
- MDF is really heavy, and for this project I should have just left it off. Its weight makes the whole table feel more solid, but the whole table sags a bit, and I think it's caused by the additional weight. The plywood with the edge banding should have been fine without it.
- Every time I sit at the table, I kick myself for not jointing the edges. I saved time and effort by having the pieces cut by the lumber yard when I bought them and then just sanding them with my orbital sander, but after applying the finish, I can clearly see every saw blade mark. That's not something I can easily fix, so I live with it, but it's a constant reminder. I also would have tried using pocket screws to attach the edges to the tabletop, which might have made everything more even.
- Speaking of modifying the dimensions, I should have learned from the cradle project that there are standard dimensions for certain items. We can't use many tablecloths, because a 4' x 9' table is not a standard size.
Otherwise, I'm fairly happy with the results - I'd give it a 7 out of 10 overall.